Experimental setup
We established several experiments for training and benchmarking our models, including the Oxford pet experiment and the histology images experiment.
Oxford III Pet
Our first experiment was elaborated on the Oxford-IIIT Pet Dataset. This dataset contains 37 classes of pets, with around 200 images per class. The dataset is divided into a training set and a test set. The training set contains 3680 images, and the test set contains 3669 images. The images are of different sizes and aspect ratios. The dataset is available at the following link: https://www.robots.ox.ac.uk/~vgg/data/pets/
In particular, we used an implementation of this dataset in a simplified and easily retriable format, available at the following link:
https://github.com/UN-GCPDS/python-gcpds.image_segmentation
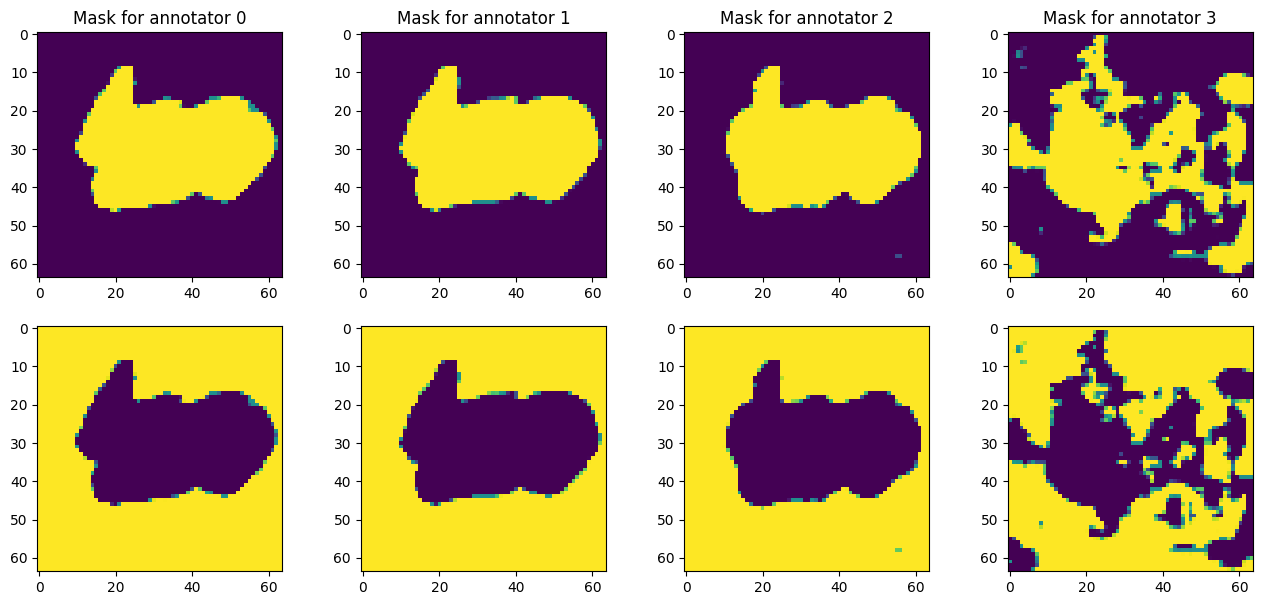
Scorers emulation
On itself, the Oxford-IIIT Pet dataset contains the masks which reffer to the ground truth and not to labels from different annotators, which makes this dataset non suitable for the original intention of the project. However, we used this dataset to emulate the scorers’ behavior, by training previously a model with a simple UNet architecture and then using this model to predict for being disturbed in the last encoder layer for producing scorers with different lebels of agreement.
Crowd Seg Histopatological images
Our second experiment was elaborated on the CrowdSeg dataset, which consists of Triple Negative Breast Cancer images labeled by 20 medical students.
This dataset fairly represents the original intention of the project, which is to provide a tool for pathologists to segment histopathological images.
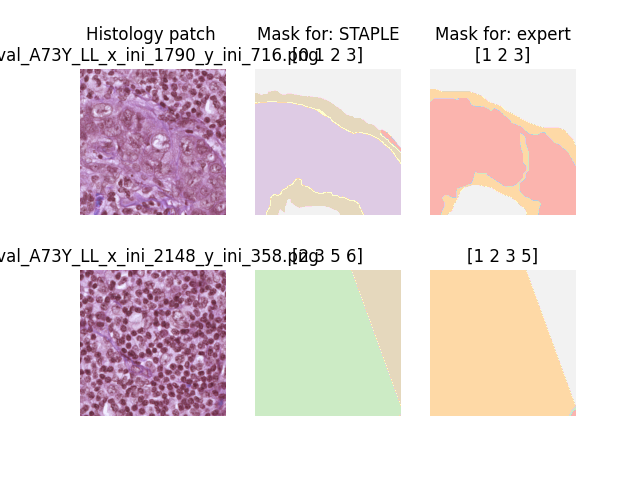
The dataset is conformed by several histology patches of size 512x512 px. Masks labels exits for an expert pathologist and 20 medical students. Every single patch contains label for every annotator as shown in the figure:
Fetching and loading the dataset
You can use the simple API provided by the seg_tgce.data.crowd_seg
for either Fetching all available data or a single stage (train, test of
val).
You can fetch your data simply like this:
from seg_tgce.data.crowd_seg import get_all_data

train, val, test = get_all_data(batch_size=8)
for i in range(1):
   img, mask = val[i]
   print(f"Batch {i}: {img.shape}, {mask.shape}")
Output:
Batch 0: (8, 512, 512, 3), (8, 512, 512, 6, 23)
A single stage can also be fetched, and even visualized:
from seg_tgce.data.crowd_seg import get_stage_data
from seg_tgce.data.crowd_seg.stage import Stage

val = get_stage_data(stage = Stage.VAL, batch_size=8)
val.visualize_sample()
When running
the visualize_sample method, the generator will load the images and
masks from the disk and display them, with a result similar to the
following:
Loading the dataset manually
If you already have a downloaded dataset in a certain directory, you can
load it symply as a keras sequence with the ImageDataGenerator
class:
from seg_tgce.data.crowd_seg import ImageDataGenerator
val_gen = ImageDataGenerator(
image_dir="<path to your dataset root>/Histology Data/patches/Val",
mask_dir="<path to your dataset root>/Histology Data/masks/Val",
batch_size=16,
n_classes=6,
)
print(f"Train len: {len(val_gen)}")
print(f"Train masks scorers: {val_gen.n_scorers}")
print(f"Train masks scorers tags: {val_gen.scorers_tags}")
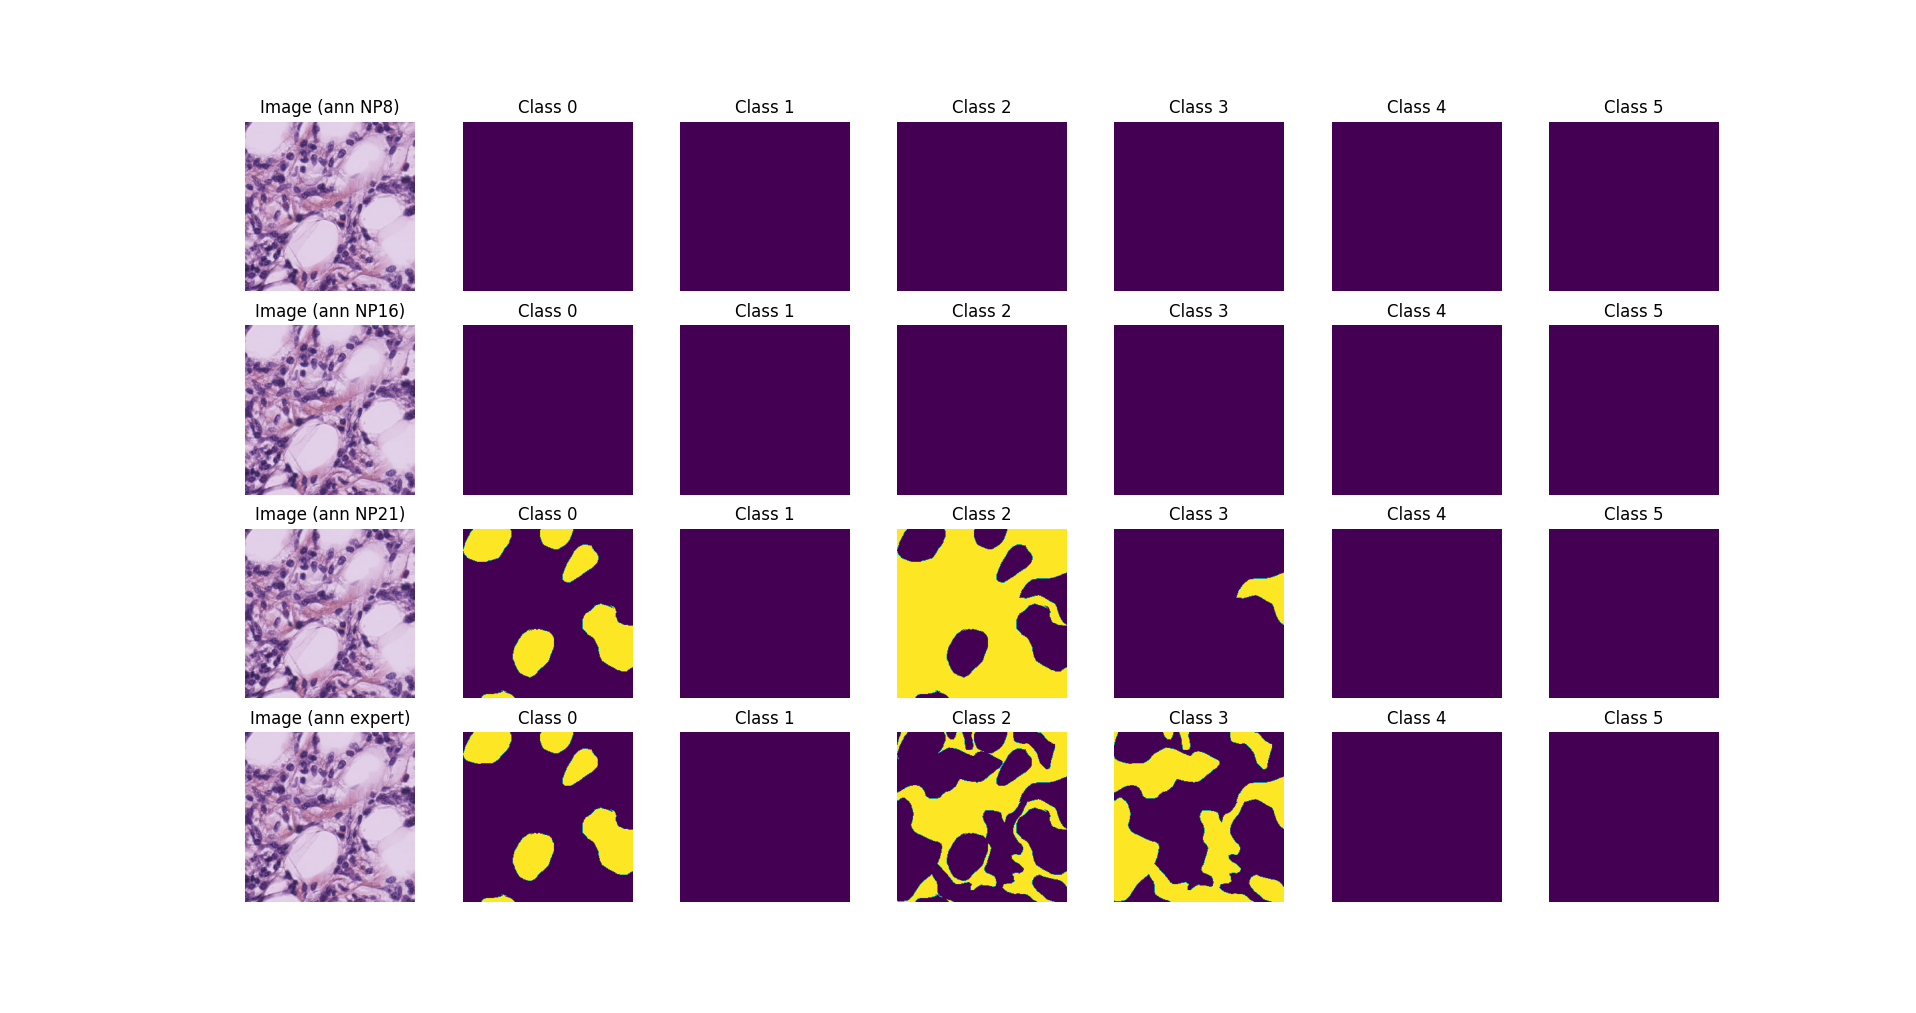
val_gen.visualize_sample(
batch_index=8,
sample_index=8,
scorers=["NP8", "NP16", "NP21", "expert"],
)
The ImageDataGenerator class is a subclass of the Keras Sequence
class, which allows us to load the dataset in a lazy way.